Friday, 1 November 2013

Chocolate Hazelnut Brownies

So I'm still playing catch up with blog posts that I should have uploaded during the month of October. Returning to college and still working away like I had done, just really got on top of me for a while there. I'd no time for myself never mind blogging, but, have no fear, a fresh new month has me back and ready for action :)


So a few weeks ago, there was a new addition to the Murphy family - no not a new born baby- but, MY VERY OWN, BRAND NEW KENWOOD KITCHEN MACHINE!!!! I was more excited than a kid on Christmas morning getting my new toy home, so, as soon as it was out of it's box, I had to give it a try! I decided to make some Chocolate Hazelnut Brownies to see what my new best buddy was like in action. It was SO much quicker, easier and less messy (mam was really happy about that part) to use than the ancient 1970s mixer I had been using previously, so, I think it's safe to say that I am actually IN LOVE!!!!! 


For the Brownies, you will need...

3.5 oz Butter (softened)
10 oz Caster Sugar
4 oz Plain Flour (sieved)
1 tsp Baking Powder
4 Eggs (lightly beaten)
Pinch of Salt
6 oz Dark Chocolate (chopped)
2 oz Chopped Hazelnuts
Handful whole Hazelnuts (for decoration)

Method

1) Preheat your oven to 180C/ 350F/ Gas Mark 4 & line an approx. 10x8 inch shallow baking tray with greaseproof paper
2) Melt the butter over a low heat, and, while the butter is melting, weigh up the cocoa and sugar into your mixing bowl
3) When melted, pour the butter into the mixing bowl with the cocoa and sugar and beat 
4) Add in the eggs and as you're doing so, beat at a high speed
5) Add in the flour, baking powder & salt, one spoonful at a time and beat
6) Stir in the chocolate chunks and the chopped hazelnuts


7) Pour the mixture into the shallow baking tray, sprinkle the whole hazelnuts on top and bake for 30 minutes


8) When baked, leave it to cool in its tin for 10 mins and then remove it from the tin and leave to cool fully on a wire rack 
9) When fully cooled, you can slice the brownies into individual slices (they can be as big as you like!!)


Enjoy!!!

Tuesday, 29 October 2013

Spooky Halloween Cupcakes

So we had a spooky Halloween party this weekend in the Murphy house, and of course, me, being me, HAD to bake some sort of sweet treat for our guests. Besides, what's a party without cake?! After much deliberation I decided to go for bite size Ghostly cupcakes which were seriously quick and easy to make. These are perfect for Halloween parties or even to hand out to trick-or-treat-ers for something that little bit different.


Ingredients

225g Butter (softened)
225g Caster Sugar 
225g Self Raising Flour (sieved)
4 large Eggs
2 tbsp Cocoa Powder (sieved)


Method

1) Preheat your oven to 180C/ 350F/ Gas Mark 5 and line a bun tray with mini muffin cases 
2) Cream the butter and sugar together until nice and creamy 
3) Add eggs one by one while the mixture is still beating 
4) Then add by the sieved flour, one spoonful at a time while mixing 
5) Finally add in the cocoa powder and when the mixture is light and fluffy fill each bun case with a tiny amount of the mixture 
6) Bake for approx 10 mins and leave to cool on a wire tray


While the cupcakes are in the oven you can make your butter cream by combining 200g of Icing Sugar, 100g of Butter and 1 tsp of Vanilla Extract until the mixture is light and fluffy.  


When the buns are fully cooled, you an pipe the buttercream. I used the open hole piping nozzle for the ghost effect. I then stuck on small decorative balls for the eyes and mouths.


 Here are a few pictures of myself and my spooooooky guests...


Sunday, 20 October 2013

Vanilla & Chocolate Mousse Cupcakes

I've been so caught up with returning to college and continuing to work in The Coffee Shop that I haven't written a blog post in an entire month! So right now my main aim is to write as many posts as I can about all the baking bits 'n' bobs I've been getting up to over the past few weeks. I'm going to start off with these Vanilla & Chocolate Mousse Cupcakes which I baked last week for my boyfriend Dave who is a total chocolate monster. He absolutely LOVES these bad boys, so, seens as he hadn't been feeling the best I baked a batch for the patient to attempt to cheer him up :)


* PLACE A LARGE BOWL IN THE FRIDGE BEFORE DOING ANYTHING ELSE *


Ingredients

50g Butter (softened)
Half Cup Caster Sugar
2 Cups Self Raising Flour (sieved)
1 tsp Baking Powder (sieved)
1 Egg (beaten)
1 Cup Milk
80g Dark OR Milk Chocolate (broken into pieces)
80g White Chocolate (broken into pieces)
Drop of Vanilla Extract
1 tbsp Cocoa Powder

** TIP: You may not have taken your butter out early enough to soften, if this is the case, simply grate the butter into the mixing bowl so it softens much more quickly. **

Method

1) Preheat your oven to 190C/ 375F/ Gas Mark 5 and line a muffin tray with bun cases
2) Cream your butter and sugar together in a bowl until slightly fluffy in consistency
3) Add the beaten egg and milk into the mixing bowl and continue to beat
4) Add in the SIEVED flour and baking powder and continue to beat the batter.
5) When fully mixed, divide the batter in two.
6) To one half, add the cocoa powder and dark/milk chocolate chunks and mix
7) To the other half, add the white chocolate chunks and the vanilla extract
8) Half fill each bun case with the white mixture and then top with the brown
9) Bake the muffins for 20 mins and when done, leave to cool on a wore rack while you prepare the mousse topping...


For the Mousse Topping...

You will need...
700g Heavy Whipping Cream
350g Icing Sugar
180g Cocoa Powder
Pinch Salt

1) Place all your ingredients in your chilled bowl you placed in the fridge earlier and whip together until the mixture holds a peak
2) Put the mixture back in the fridge for a further 10 mins
3) Pipe the icing onto the cupcakes in whatever fashion you wish


Thursday, 19 September 2013

Mars Bar Krispie Squares

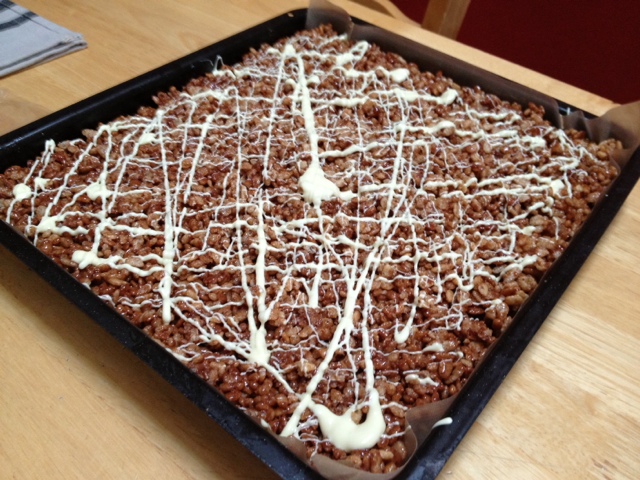
Mars Bar Squares are definitely one of my faves and they are SO easy to make it's ridiculous -- They're basically a Rice Krispie Bun, but instead of using plain chocolate you use Mars Bars and instead of putting them in individual bun cases, you let them cool in a tray and then cut them into squares. They're ideal for bringing on picnics, for kids parties or even for having out on the table when guests are over. BEWARE - they're ridiculously tasty, once you take your first bite you might not be able to stop!!! 


I use the Avoca recipe for my squares which I adapt slightly by using white chocolate drizzled on top instead of a later of milk and by adding a few other extra touches.


Ingredients

200g Butter
200g Rice Krispies
1 tbsp Golden Syrup
8 Lg Mars Bars
100g White Chocolate (for top)


Method

1) Prepare your baking tray by lining it with greaseproof paper.
2) Melt the butter in a large saucepan over a low heat.
3) When fully melted, add in the golden syrup.
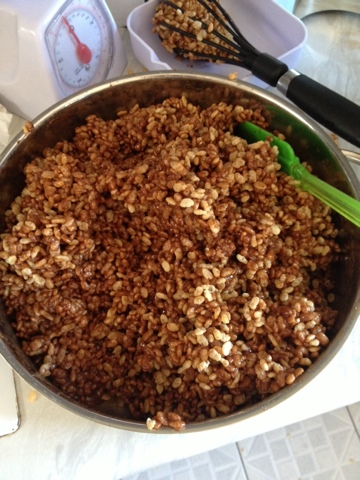
4) When combined, add in the broken Mars Bars and begin to whisk gently to combine (this may take a while so be patient) 


5) When the majority of the lumps have dissolved, turn off the heat.
6) Pour half the Rice Krispies into a separate large bowl, pour half the chocolate mixture over them and stir until all Krispies are covered.


7) Empty the combined mixture into your lined baking tray and to the same with the remaining half of the Krispies and mixture. 
8) Flatten the mixture in the tin and refrigerate for at least half an hour. 
9) When cooled, you can melt the white chocolate (I find the easiest way to do this in the microwave - stop and stir after every 30 seconds) 
10) Using a spoon drizzle the white chocolate over the Krispies in a zig zag motion.

11) Refridgerate again for a further 30 mins and then slice it into whatever shapes and sizes you wish.

I doubled the mixture so the measurements above will make half the amount pictured :)

Monday, 16 September 2013

Raspberry & Fresh Cream Light Sponge

Sometimes there's nothing better than baking a fresh sponge cake to have in the afternoon with tea. This particular one is really light as it only uses three simple main ingredients; eggs, sugar and flour. This sponge is really quick and easy to make and could also be used as a cake for any special occasion :) 


Ingredients 

6oz Self Raising Flour (sieved)
6oz Caster Sugar 
6 Large Eggs / 7 medium sized 
1 tsp Vanilla extract
1 tsp Baking Powder (sieved)

Method

1) Preheat your oven to 190C/ 375F/ Gas Mark 5, and grease two 8 inch round baking tins with melted butter.
2) Cream the butter and eggs together using an electric mixer until the mixture has almost doubled in volume.
3) When the mixture is light and fluffy (be patient, this could take a while), add in the vanilla essence followed by half of the sieved flour and baking powder and continue to beat. - the mixture should be quite airy.
4) Turn off the beater, and, using a metal spoon, fold the the remaining flour. (this allows lots of tiny air pockets to form)
5) Divide the mixture evenly amongst your two baking tins and bake in the oven for 20-25 mins. (the cakes should be firm and golden brown when cooked)
6) Allow the cakes to cool on a wire rack and then prepare them for filling by slices any risen bumps in the centre off to make them flat.


For the filling, I used fresh cream, raspberry jam and a few fresh raspberries. You can use any fillings of your choice - buttercream instead of fresh cream, strawberry jam, Nutella, whatever you like really :) 


 I also dusted the top of my sponge with icing sugar but berries or chocolate can also be used as delicious toppings :)


I had a little helper during the week; my godson Josh whose favourite job was definitely licking the beaters :) 


Sunday, 15 September 2013

Orange Butter Cream Squares

My triplet brothers made their debs a few weeks ago, and, being typically Irish, Mam asked me to make a few bite-size treats as their three dates plus their families would be arriving up the house. I decided to go for bite-size Mars Bar Squares and Orange Butter Cream Squares. Both were extremely easy to make and they went down a treat :) 


Ingredients

(FOR THE CAKE)

225g Butter (softened)
225g Caster Sugar
225g Self Raising Flour (sieved)
4 Eggs
Zest of 2 Oranges

(FOR THE BUTTER CREAM)

100g Icing Sugar
50g Butter (softened)
1 tbsp Orange Juice


Method

I never used to weigh up all of the ingredients before starting to get to work which was a bad move. Whenever I bake now, I weigh up everything beforehand which I highly recommend you do :)

1) Preheat your oven to 180C/ 350F/ Gas Mark 4
2) Line an approx. 30 x 30 cm flat baking tray with greaseproof paper .
3) Using an electric beater, cream the butter and sugar together.
4) When light and creamy, add in the eggs one by one and continue to beat.
5) Add in the sieved flour bit by bit and beat until the mixture is light and fluffy.
6) Then add in the orange zest and mix through.
7) Pour the mixture into the flat tin and put it in the oven.
8) After 20 mins check the cake (it should be golden brown, but if not bake for further 5-10 mins)
9) Leave the cake to cool on a wire rack while you make the butter cream.


10) Cream the soft butter and icing sugar together using an electric mixer until its really light and fluffy - BE PATIENT, it could take a while!!
11) Add in the orange juice and continue to beat through.
12) Leave the butter cream to sit while you cut the cake into small squares.
13) Then using the star shaped piping nozzle, pipe a small amount of the butter cream onto each piece of cake.

When serving, I like to dust over he squares with icing sugar - It makes them look that little bit prettier and it covers up any little mistakes ;) 


Monday, 26 August 2013

Homemade Hawaiian Style Beef Burgers

I spent the past two weeks minding my auntie's house while she was away so that meant free reign on the kitchen for me :) I had taken mince out of the freezer one night and didn't fancy the usual spaghetti bolognese or tacos so I decided to make homemade burgers. I'd never made burgers before but I went for it anyway. I cooked the burgers on the George Foreman Grill but they could easily be cooked on a barbecue, pan or under the grill. The burgers were surprisingly easy to make and they tasted deeeeelicious...


Ingredients


500g Minced Beef
Half a Small Onion (finely chopped)
2 Cloves Garlic (finely chopped)
2 tsp Cumin
1 tsp Mixed Herbs
1/2 tsp Ground Black Pepper
Handful Breadcrumbs
1 egg (beaten)
Salt

Mature Cheddar Cheese
Fresh Pineapple (cut into rings)
Rocket Leaves
Mango Chutney
Sesame Seed Bundies 


Method

1) Mix the mince, finely chopped onion and garlic in a large bowl
2) Add in the pepper, cumin and mixed herb seasonings followed by the breadcrumbs and beaten egg.
3) When combined, empty the bowl onto your worktop and mold the mince into medium sized patties.
4) Refrigerate the burgers for at least 20 mins before cooking.
5) After the 20 mins have passed, sprinkle a small amount of salt on each of the burgers and grill them until the meat is cooked through.
6) Grill the pineapple, toast your burger buns and serve with cheddar cheese, mango chutney and rocket leaves.


Someone liked them anyway :)