Monday, 29 September 2014

Apple & Autumn Berry Crumble

Crumble is one of my all time favourite desserts - if it's on the menu I'll most definitely be ordering it. This seasonal apple and Autumn berry crumble is a must try. Once you experience the smell of it baking in the oven you won't be able to resist !After all everybody needs a little comfort food at this time of year.
Ingredients
(Makes 6 portions)

FOR THE FILLING

6 Cooking Apples (peeled, cored and sliced)
3 Cups of Frozen Berries (blackberries, raspberries, blackcurrants work best)
6-7 tbsps Caster Sugar

FOR THE CRUMBLE

2 cups Plain Flour
1.5 cups Brown Sugar
Half tsp Cinnamon or Mixed Spice (sieved)
1.5 Cups Butter (softened)

___________________________________________

Method

FOR THE FILLING

1) Peel, core and slice the apple. Add it to your pot with 3 tbsp of sugar and 3 tbsp of tap water. Stew the apple by bringing to the boil and allowing to simmer for 5 minutes. Stir constantly. Leave to one side.

2) In a separate pot, add the berries and the remaining caster sugar. Again, stew by bringing to the boil and allow to simmer for 5 minutes. Leave to one side and, once cool, combine the apple and the berry mixtures.

3) Preheat your oven to 180C/ 350F/ Gas Mark 4.

4) To make the crumble, add the flour, sugar and cinnamon/ mixed spice to a bowl and combine. Cut the softened butter into cubes and, using your fingertips rub together until the mixture takes on the consistancy of breadcrumbs.

5) To assemble, fill each ramekin with the fruit and top with crumble. Place on a flat baking tray and stick in the oven for approx. 8 minutes until the crumble is golden brown in colour.

*You can store the fruit in a sealed container in the fridge for up to a week. You can also store the crumble in a separate sealed container in a cool dry place for 4 -5 days before baking.*


These gorgeous mini ramekins from Viking Direct are ideal for making individual crumbles. There's something that bit nicer about tucking into your own little ramekin of deliciousness !Viking Direct have a massive selection of kitchenware and bakeware on their site - you'll be sure to find something you love.


The crumble is delicious served with a scoop of Carte D'or Vanilla Icecream on top, a dollop of Chantilly Cream or a spoon or two of Creme Anglaise -serious comfort food!

Saturday, 27 September 2014

Blackberry Scones

I've become blackberry crazy over the past few weeks. I use them in everything - when they grow right outside the door surely it would be a sin not to use them up! I fancied fresh scones this morning but when I realised I had no raisins I didn't know what to throw in. I went for a few blackberries I had picked with my little godson the day before.They  worked a treat. The delicious smell of these bad boys baking will be sure to have the troops out of bed and at the breakfast table in no time. 

Ingredients 
MAKES 8 SMALL SCONES 

Plain Flour
100g Caster Sugar
1 tsp Baking Powder
Butter 
1 cup Milk and Water to bind 
Handful Blackberries 


Method 

1) Preheat your oven to 180C/ 350F/ Gas Mark 4 and line a flat baking tray with grease proof paper. 

2) Add all of the dry ingredients along with the butter (cut into cubes), to the bowl. Using your fingertips rub the butter into the floury mixture until combined. 

3) Add half the milk and water to the bowl and stir - continue to add until the mix binds like a dough. 

4) Empty the bowl onto your flour dusted work surface and fold in the blackberries. Roll until the dough is about an inch thick and cut with your scone cutter. 

6) Place the scones onto your lined baking tray and bake for 15- 20 minutes until golden brown. Leave the scones to cool on a wire rack or enjoy hot with melted butter - yum!!!
-------------------------------

*Store the scones in an airtight container
 (if they happen to last past the cooling rack that is!) *

Monday, 15 September 2014

Mixed Berry Compote

Kids are heading back to school which means that Summer is coming to an end but that Autumn is just around the corner. Colourful walks through the leaf-strewn woods, fresh seasonal berries and fruits to bake with, wrapping up because its getting that little bit nippy - what's not to love? 


 There are so many baking possibilties with what Autumn has to offer. One of my favourites, although its not really baking, has to be fresh Autumn berry compote. I for one never thought that making berry compote could be so easy. Who knew it could be ready to eat in a matter of minutes! 


Ingredients
FOR 2  JARS

350g Frozen Berries 
Fresh Blackberries (throw in whatever you have harvested)
6-7 heaped tbsp Light Brown Sugar
2 tbsp Lemon Juice

Method

1) Add the berries, lemon juice and sugar to a large pan and stir.
2) Allow the mixture to come to the boil and then to simmer for 4-5 minutes.
3) You can serve the compote warm or hot but, before storing allow it to cool. Store the compote in the fridge once cool. It keeps for up to a week days although it never lasts quite that long in my house! 


I used my gorgeous preserve jars from Viking Direct to store the compote. They're perfect for keeping the compote fresh and they look that bit nicer than a regular jam jar!Viking Direct have a great range of bakeware and kitchenware - you'll be sure to find something you'd love on their site.


My favourite way to enjoy berry compote is to stir it into my bowl of porridge along with Linwoods Milled Organic Flaxseed. I mean who wouldn't love healthy pink porridge? 


Serving Suggestions
ENJOY BERRY COMPOTE WITH...

yogurt
pancakes
ice-cream 
sponge cake 
toast 
sweet bread

Wednesday, 10 September 2014

Autumn Berry Smoothie

It's that time of year again which means that blackberries are everywhere! I picked a bucketful last week and knew instantly that I had to make something seriously purple with my find and this autumn berry smoothie was it! It's super easy to make - simply blend all of the ingredients below together and enjoy!


Ingredients
MAKES & SMALL GLASSES

2 bananas
2 apples 
2 pears
2 cups blackberries
1 cup apple juice
6 tbsp yogurt (Glenisk Pure Original Blueberry Yogurt is great!)
Half a cup of crushed ice


Chocolate Meringue Feast

I was invited for Sunday lunch last week so thought that I better whip up something special for dessert. I considered a sundae or something small but felt creative and went all out instead. I had never combined meringue with sponge cake before but had always thought that it looked pretty good. I whipped up a sticky chocolate fudge sauce to pour over the top and used Chantilly Cream for the filling - yum! 


Ingredients

FOR THE MERRINGUE

6 Egg Whites
150g Caster Sugar

FOR THE CHOCOLATE FUDGE SAUCE

2 Egg Yolks
150g Sugar
50g Plain Chocolate
3  tbsp Water
50g Butter

FOR THE CHOCOLATE SPONGE

250g Caster Sugar
250g Butter (softened)
4 Eggs
250g Self Raising Flour
6 tbsp Cocoa Powder

FOR THE CHANTILLY CREAM

250ml Whipping Cream
2 tbsp Icing Sugar
1 tsp Vanilla Extract


Method

FOR THE MERRINGUE

1) Preheat your oven to 110C/ 230F/ Gas Mark 1/4 and line two baking trays with greaseproof paper.
On one of the sheets, draw a circle around an 8 inch round baking tin and leave both to one side.

2) Whisk the egg whites in the electric mixer until when lifted, the beater forms a peak in the mixture. Add the sugar, a few spoons at a time and continue to whisk again until the mixture forms a peak when the beater is lifted.

3) On one tray, using a piping bag and star nozzle, pipe the mixture into small shapes like you would icing on top of a cupcake. On the other tray, pipe the mixture so it fills the 8 inch circle shape you drew earlier.

6) Place both trays in the oven and bake undisturbed for 1 and 3/4 hours.

-------------------------------


FOR THE CHOCOLATE FUGDE SAUCE

1) To make a syrup, dissolve the sugar in the water in a saucepan and bring to the boil until it has reached 110 degrees on your sugar thermometer.

2) Whisk the syrup and the egg yolks until the mixture is thick and mousse-like and leave to one side while you melt the chocolate in a heat proof bowl over a pot of simmering water.

3) Leave the chocolate to cool slightly for 5 minutes. Then beat the butter and chocolate together and add the syrup mixture and continue to beat.

-------------------------------

FOR THE CHOCOLATE SPONGE

1) Preheat the oven to 180c/ 350F/ Gas Mark 4 and grease and line an 8 inch round baking tin.

2) Cream the butter and sugar together in your mixing bowl until creamy and pale in colour. Add the eggs and continue to beat until light and fluffy. Then add the flour and cocoa powder, one spoon at a time and beat further until of light and fluffy consistancy again.

3) Pour the mixture into your tin and bake for approx. 40 minutes until firm to touch.


Saturday, 23 August 2014

Easy Peasy Pavlova Bites

If you're looking for something easy to whip up for dessert this Summer, you should definitely try these easy peasy pavlova bites. You can make the base up to a week and a half before the day you plan to serve them which leaves only the assembling for the busy day - super! 


Ingredients 
3 egg whites 
100g caster sugar 
50g icing sugar

For Decoration
250ml fresh whipping cream 
Fresh berries of your choice 
Grated or melted chocolate 

----------------------------------

Method

1) Preheat your oven to 110C / 230F / Gas Mark 1/2, and line a flat baking tray with greaseproof paper.
2) Whisk your egg whites using an electric mixer until the mixture forms a peak when the beater is lifted. 
3) Add half the caster sugar to the mixing bowl and mix again until the mixture forms a peak again when the beater is lifted. 
4) Add the remaining caster sugar to the bowl and once again beat for aprox 5 minutes until the mixture forms a peak again once the beater is lifted. 
5) Fold the icing sugar into the mix using a metal spoon, then fill you piping bag fitted with a large star nozzle with the mix and pipe small amounts of the mix onto your baking tray. 
6) Bake the mini pavlovas for 1.75 hours, then leave to cool before storing in an airtight container. 

----------------------------------------------------------------------------------

When Decorating...

Whip the fresh cream with a small drop of vanilla extract and again fill your piping bag fitted with the star shaped nozzle with the mix. Pipe the cream onto each of the mini pavlovas and top with berries of your choice. Sprinkle with grated chocolate or drizzle melted chocolate over the pavlovas and dust with icing sugar. 


You can easily use any left over meringues to top a chocolate and fresh cream cake or any cake for that matter! 

Saturday, 16 August 2014

Red Velvet Cake with Cream Cheese Frosting

I recently attempted my first ever red velvet cake that was, much to my concern, for an order!  I decided to try a few recipes to figure out the best. They were up to their ears in red velvet and cream cheese frosting at home - I doubt they ever want me to bake another again! I used a brilliant recipe which I found in a gorgeous cookbook given to me by my mam at Christmas time. It was extremely easy to follow and the results were perfect. 


Red velvet is an interesting cake to bake. The deep reddish brown colour is a result of a chemical reaction between baking soda, buttermilk and cocoa powder. Many add more red food colouring for a much brighter shade of red that serves as a brilliant contrast colour to the white cream cheese frosting. 


Ingredients 

FOR THE RED VELVET SPONGE

280g Plain Flour (sieved)
55g Cornflour
1.5 tsp Baking Powder (sieved) 
280g Caster Sugar 
225g Butter (softened)
4 tbsp water
55g Cocoa Powder 
3 Eggs (lightly beaten) 
250ml Buttermilk
2 tsp Vanilla Extract 
3-4 tbsp Red Food Colouring 


FOR THE CREAM CHEESE FROSTING 

50g Cream Chesse 
50g Butter (softened)
200g Icing Sugar 
1tsp Vanilla Extract 
1-2 tbsp Boiling Water 

-------------------------------------

Method

FOR THE RED VELVET SPONGE 

1) Preheat the oven to 190C / 400F / Gas Mark 5, grease 2x 6 inch round cake tins with melted butter and line with grease proof paper. 

2) In a small pot, melt the butter and cocoa powder. When combined, take off the heat and leave to sit and cool slightly. 

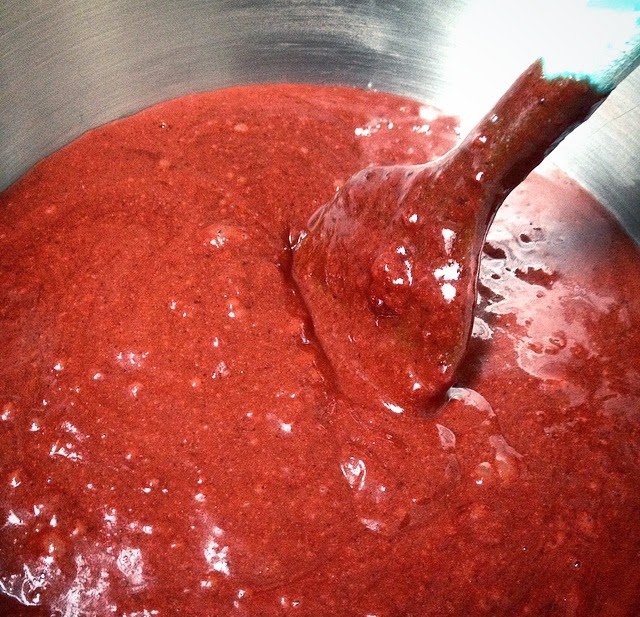
3) In a separate bowl, whisk the eggs, vanilla extract, buttermilk and red food colouring until the mixture forms bubble or a froth. 


4) In another separate bowl, add the sieved flour and baking powder followed by the sugar. Mix and leave to one side. 

5) Add the butter mixture to the whisked mixture and stir. Once combined, fold in the dry ingredients using a metal spoon. Only add 3-4 spoonfuls at a time.


6) Once combined, divide the mix between the two tins and bake for approx. 35 minutes. The cakes should e firm to touch. Once baked, leave the cakes to cool in their tins for 3-4 minutes. Then remove them from the tins and leave to cool fully on a wire wrack. 

----------------------------------

FOR THE CREAM CHEESE FROSTING 

1) Using your electric mixer, combine the cream cheese and the softened butter. Once combined, add the icing sugar and beat. 

2) When the mixture has reached a paste like consistency, add the vanilla extract followed by the boiling water and beat continuously for 5-6 minutes. If the frosting is still quite heavy and thick add another  tsp of boiling water. 

---------------------------------

For a sandwich style red velvet cake, simply place one cool sponge on your plate or cake board, spread a layer of your cream cheese frosting, place the other sponge on top and completely cover the cake in the remaining frosting using your pallet knife, I piped the icing for effect but either will work well. I also used a red velvet ribbon to decorate. 


If you'd rather make red velvet cupcakes simply follow the same recipe but, instead of using the two cake tins, use a muffin tray lined with bun cases. Bake the cupcakes for 15- 20 minutes until firm to touch and leave to cool on a wore wrack before icing. For something a little different, I say one bun on top of the other to form a sandwich.