Showing posts with label CAKE. Show all posts

Thursday, 21 May 2015

Let's Play Catch Up

It's been a helluva long time since I last posted so much as a picture up here - but - have no fear - I am back in action! I have had a pretty hectic past few months between travelling and beginning to work at the new place that I haven't had a second to even scribble down an idea for YummmmyyI have however been snapping away, making sure to take pics of everything I have made or eaten over the past few weeks.  And so, without further adieu,  here's the food camera role...


Salted Caramel Glazed Choux Buns with a Vanilla Pastry Cream Filling. Trying recipes from work at home has to be one of my utmost favourite things. I spend so much time talking about what I'm doing in the pastry kitchen that when I finally show my family and friends the real goods that I can actually also produce at home there's a real sense of achievement.


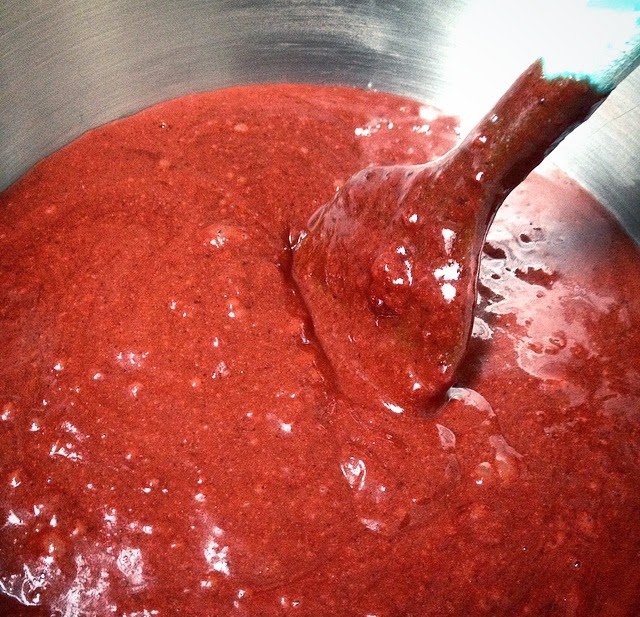
Breakfast is clearly still a huge deal for me - it's 100% my favourite meal of the day. This is home-made granola, natural Greek yoghurt, fresh fruit and home-made rhubarb, apple and ginger compote. Grandad has a seriously overgrown rhubarb patch in the garden so when he began to offer me bundles after bundles of the stuff I had to be a little more creative than good old rhubarb crumble.
  

After a pretty crazy night out in town, myself and my brother Al decided to venture to TBC, the pop-up cafe by Daniella Moyles and Yogism in the George's St, Arcade to try the famous buckwheat-flax breakfast pancakes and frozen yoghurt. Holy moly were they good! Al went for the protein pancakes with fresh berries and fro-yo and I decided to try them with pineapple, maple syrup and coconut natural yoghurt. If I lived in town you would more than likely find me perched at a coffee table there every morning - they really were that good.


I HAVE FINALLY MASTERED THE SOUFFLÉ
I was seriously proud in work one evening to find that my soufflé had risen almost half its height. According to our head chef, my soufflé won out, hands down, over our chef de partie's best! No one has been able to wipe the smile off my face since.


I live in the Happy Pear - the greatest place to eat in County Wicklow. I really don't know how it has possibly taken me so long to discover this place but I'm so unbelievably happy to have now. The food there is unbelievably good. Everything is organic and healthy. Their salads are, hands-down, the best I have ever tried. They use fruit juices and nut butters to dress which I absolutely love due to my strange fear or mayonnaise and vinegars. Myself and my pal Mai have made it our morning ritual to stop by for a bowl of the place's delicious porridge topped with fruit compote and granola after the gym. The porridge is FREE and it's a mere euro for any toppings - you'd be a fool not to try it!


After a seriously long week I snapped a quick pic of my last plate in the restaurant. Peanut parfait with peanut brittle, cardamom foam, sesame paste and Dulcey Chantilly. I was one happy chef watching the waiter take that final plate from my pass.


It was my little cousin Oisín's 6th birthday a few weeks ago so, to celebrate, I baked him a lemon sponge with lemon curd, fresh strawberries and lemon butter cream. 


Another work recipe tried at home - homemade marshmallow. We make some pretty whacky flavours to serve as petit fours. However, at home I made a batch of vanilla which were deeeeelicious in vanilla and chilli hot chocolate.


Cutting chocolate biscuit cake - one of my least favourite things to do in work. They always seem to crumble to pieces. When I was asked to make a chocolate biscuit cake for an order I was amendment to find a recipe that held and would be easy on the poor soul left with the awkward task of cutting it. My head chef suggested using condensed milk as an alternative to sugar and golden syrup which actually worked a treat. Hopefully Ireland's bakers catch on and I no longer have to piece crumbly old biscuit cake together in order to form a few slices !


Macaroons - something I had never made up until a few weeks ago. I was so surprised at how easy they are to make - it's unbelievable! 


My "healthy balls ".
I have been warned by Mam not to call them that but I couldn't resist! These raw cacao, pecan and date bites are made with all natural and healthy ingredients. They're a delicious health conscious treat that really don't taste the slightest bit healthy. Don't worry, there will be a recipe to follow.

My Dad has entered into a new fase that I like to call smoothie madness. I'm not complaining though - every morning I wake up to a delicious vitamin packed smoothie to set me up for the day. The best part is that I don't even have to wash the blender! He puts everything, and I mean EVERYTHING, into his smoothies - carrots, ginger, cinnamon, avocados, even oranges and lemons with skins and all -  the list goes on. They're surprisingly delicious nonetheless. 


Hubba hubba...
Mam arrived home yesterday with a pack of Belgian sugar waffles. I decided to be bold and topped them with Nutella, fresh raspberries, date syrup, natural Greek yoghurt and toasted pecan nuts. They were heavenly.

Wednesday, 10 September 2014

Chocolate Meringue Feast

I was invited for Sunday lunch last week so thought that I better whip up something special for dessert. I considered a sundae or something small but felt creative and went all out instead. I had never combined meringue with sponge cake before but had always thought that it looked pretty good. I whipped up a sticky chocolate fudge sauce to pour over the top and used Chantilly Cream for the filling - yum! 


Ingredients

FOR THE MERRINGUE

6 Egg Whites
150g Caster Sugar

FOR THE CHOCOLATE FUDGE SAUCE

2 Egg Yolks
150g Sugar
50g Plain Chocolate
3  tbsp Water
50g Butter

FOR THE CHOCOLATE SPONGE

250g Caster Sugar
250g Butter (softened)
4 Eggs
250g Self Raising Flour
6 tbsp Cocoa Powder

FOR THE CHANTILLY CREAM

250ml Whipping Cream
2 tbsp Icing Sugar
1 tsp Vanilla Extract


Method

FOR THE MERRINGUE

1) Preheat your oven to 110C/ 230F/ Gas Mark 1/4 and line two baking trays with greaseproof paper.
On one of the sheets, draw a circle around an 8 inch round baking tin and leave both to one side.

2) Whisk the egg whites in the electric mixer until when lifted, the beater forms a peak in the mixture. Add the sugar, a few spoons at a time and continue to whisk again until the mixture forms a peak when the beater is lifted.

3) On one tray, using a piping bag and star nozzle, pipe the mixture into small shapes like you would icing on top of a cupcake. On the other tray, pipe the mixture so it fills the 8 inch circle shape you drew earlier.

6) Place both trays in the oven and bake undisturbed for 1 and 3/4 hours.

-------------------------------


FOR THE CHOCOLATE FUGDE SAUCE

1) To make a syrup, dissolve the sugar in the water in a saucepan and bring to the boil until it has reached 110 degrees on your sugar thermometer.

2) Whisk the syrup and the egg yolks until the mixture is thick and mousse-like and leave to one side while you melt the chocolate in a heat proof bowl over a pot of simmering water.

3) Leave the chocolate to cool slightly for 5 minutes. Then beat the butter and chocolate together and add the syrup mixture and continue to beat.

-------------------------------

FOR THE CHOCOLATE SPONGE

1) Preheat the oven to 180c/ 350F/ Gas Mark 4 and grease and line an 8 inch round baking tin.

2) Cream the butter and sugar together in your mixing bowl until creamy and pale in colour. Add the eggs and continue to beat until light and fluffy. Then add the flour and cocoa powder, one spoon at a time and beat further until of light and fluffy consistancy again.

3) Pour the mixture into your tin and bake for approx. 40 minutes until firm to touch.


Saturday, 16 August 2014

Red Velvet Cake with Cream Cheese Frosting

I recently attempted my first ever red velvet cake that was, much to my concern, for an order!  I decided to try a few recipes to figure out the best. They were up to their ears in red velvet and cream cheese frosting at home - I doubt they ever want me to bake another again! I used a brilliant recipe which I found in a gorgeous cookbook given to me by my mam at Christmas time. It was extremely easy to follow and the results were perfect. 


Red velvet is an interesting cake to bake. The deep reddish brown colour is a result of a chemical reaction between baking soda, buttermilk and cocoa powder. Many add more red food colouring for a much brighter shade of red that serves as a brilliant contrast colour to the white cream cheese frosting. 


Ingredients 

FOR THE RED VELVET SPONGE

280g Plain Flour (sieved)
55g Cornflour
1.5 tsp Baking Powder (sieved) 
280g Caster Sugar 
225g Butter (softened)
4 tbsp water
55g Cocoa Powder 
3 Eggs (lightly beaten) 
250ml Buttermilk
2 tsp Vanilla Extract 
3-4 tbsp Red Food Colouring 


FOR THE CREAM CHEESE FROSTING 

50g Cream Chesse 
50g Butter (softened)
200g Icing Sugar 
1tsp Vanilla Extract 
1-2 tbsp Boiling Water 

-------------------------------------

Method

FOR THE RED VELVET SPONGE 

1) Preheat the oven to 190C / 400F / Gas Mark 5, grease 2x 6 inch round cake tins with melted butter and line with grease proof paper. 

2) In a small pot, melt the butter and cocoa powder. When combined, take off the heat and leave to sit and cool slightly. 

3) In a separate bowl, whisk the eggs, vanilla extract, buttermilk and red food colouring until the mixture forms bubble or a froth. 


4) In another separate bowl, add the sieved flour and baking powder followed by the sugar. Mix and leave to one side. 

5) Add the butter mixture to the whisked mixture and stir. Once combined, fold in the dry ingredients using a metal spoon. Only add 3-4 spoonfuls at a time.


6) Once combined, divide the mix between the two tins and bake for approx. 35 minutes. The cakes should e firm to touch. Once baked, leave the cakes to cool in their tins for 3-4 minutes. Then remove them from the tins and leave to cool fully on a wire wrack. 

----------------------------------

FOR THE CREAM CHEESE FROSTING 

1) Using your electric mixer, combine the cream cheese and the softened butter. Once combined, add the icing sugar and beat. 

2) When the mixture has reached a paste like consistency, add the vanilla extract followed by the boiling water and beat continuously for 5-6 minutes. If the frosting is still quite heavy and thick add another  tsp of boiling water. 

---------------------------------

For a sandwich style red velvet cake, simply place one cool sponge on your plate or cake board, spread a layer of your cream cheese frosting, place the other sponge on top and completely cover the cake in the remaining frosting using your pallet knife, I piped the icing for effect but either will work well. I also used a red velvet ribbon to decorate. 


If you'd rather make red velvet cupcakes simply follow the same recipe but, instead of using the two cake tins, use a muffin tray lined with bun cases. Bake the cupcakes for 15- 20 minutes until firm to touch and leave to cool on a wore wrack before icing. For something a little different, I say one bun on top of the other to form a sandwich. 


Monday, 11 August 2014

Coffee Lover's Dream Cake

So last weekend I baked something a little over the top for mam's birthday. After being away for the past month what could you expect?! I was raring to get back into my apron and whip up a storm. I baked a two tier coffee lovers dream cake. The bottom tier was made up of a rich mocha sponge with a chocolate and coffee ganache filling and mocha butter cream. The top was more of a traditional coffee cake made up of a light coffee and walnut sponge, a chocolate walnut ganache filling and a smooth coffee butter cream. Coffee is one of mam's all time favourites so I had to go all out for the occasion. 


THE MOCHA BOTTOM TIER

Ingredients


FOR THE MOCHA SPONGE

400g Butter (softened)
200g Caster Sugar
200g Brown Sugar
400g Self Raising flour (sieved) 
7 Eggs 
4 tbsp Cocoa Powder 
50g Dark chocolate (grated) 
4-5 tbsp Irel Coffee Essense 


FOR THE MOCHA GANACHE FILLING

280ml Double cream
200g Dark Chocolate 
2 tsp Instant Coffee Granules 
2 tbsp Golden Caster Sugar


FOR THE MOCHA BUTTERCREAM

160g Butter (softened)
300g Icing Sugar 
50g Plain chocolate 
4 tbsp Irel coffee essence 
1-2 tbsp of boiling water 

____________________________________


* If you are unable to find Irel coffee essence simply use 1tsp of instant coffee dissolved in 1 tbsp of boiling water instead for the same results * 


Method 


FOR THE MOCHA SPONGE

1) Preheat your oven to 180C/ 350F / Gas Mark 4, grease an 8 inch round baking tin with melted butter and line with greaseproof paper. 
2) Cream the butter and sugar together using your electric mixer 
3) Once combined and white in colour add in the eggs, two at a time and beat. Allow one to two minutes of mixing between each. 
4) Once all the eggs have been added to the mixture, add the Irel coffee essence.
5) Once the essence is combined, add the flour, one spoon at a time until all is added.
6) Allow the mixer to beat for 3-4 minutes and add the cocoa powder followed by the grated chocolate and once again allow the mix to beat for a further 4 minutes. 
7) Fill your line cake tin with the mix and bake for approv 40 minutes until the sponge springs up once touched. 


* You may have a little extra mix leftover for some yummmmyy mocha cupcakes. Simply fill your muffin cases with 1-2 tsp of the mix and bake for 15- 20 mins *


FOR THE CHOCOLATE COFFEE GANACHE

1) Melt the chocolate in a bowl over a pot of simmering water
2) Add the whipping cream followed by the instant coffee and sugar and combine 
3) Leave to sit until you are ready to spread 


FOR THE MOCHA BUTTERCREAM

1) Cream the butter and sugar together using the electric mixer until white in colour 
2) Add the Irel coffee essence and the cocoa powder and beat again
3) While beating on a high speed add the boiling water- this allows the buttercream to become lighter 
4) Add the melted chocolate, one tsp at a time while mixing on high speed 
5) Leave to one side until the cake is cool. 


THE TRADITIONAL COFFEE & WALNUT TOP TIER

Ingredients


FOR THE SPONGE

225g Butter (softened)
225g Soft light brown sugar 
225g Self Raising Flour (sieved) 
4 large eggs 
4 tbsp Irel Coffee Essence 
4 tbsp Crushed Walnuts 


FOR THE WALNUT CHOCOLATE GANACHE 

250ml Double Cream 
185g Dark Chocolate
4tbsp crushed walnuts 
2 tbsp Golden Caster Sugar


FOR THE COFFEE BUTTERCREAM

150g Butter (softened) 
300g Icing Sugar 
5-6 tbsp of Irel coffee 
1-2 tbsp boiling water 

____________________________________________________

Method 

FOR THE COFFEE SPONGE 

1) Preheat your oven to 180C/ 350F / Gas Mark 4, grease an 6 inch round baking tin with melted butter and line with greaseproof paper. 
2) Cream the butter and sugar together using your electric mixer 
3) Once combined and white in colour add in the eggs, two at a time and beat. Allow one to two minutes of mixing between each. 
4) Once all the eggs have been added to the mixture, add the Irel coffee essence.
5) Once the essence is combined, add the flour, one spoon at a time until all is added.
6) Add the chopped walnuts and allow the mixer to beat for a further 3-4 minutes. 
7) Filll your line cake tin with the mix and bake for approv 40 minutes until the sponge springs up once touched. 


FOR THE COFFEE & WALNUT GANACHE 

1) Melt the chocolate in a bowl over a pot of simmering water
2) Add the whipping cream followed by the chopped walnuts and combine 
3) Leave to sit until you are ready to spread 


FOR THE COFFEE BUTTERCREAM

1) Cream the butter and sugar together using the electric mixer until white in colour 
2) Add the Irel coffee essence and beat again
3) While beating on a high speed add the boiling water- this allows the buttercream to become lighter 
4) Leave to one side until the cake is cool. 

Wednesday, 25 June 2014

When Life Gives You Lemons... BAKE!


Lemons are one of my all time favourite ingredients to bake with especially during the summer months. There's something much more delicious about a refreshing lemon cake when the weathers that bit hotter. I've tried so many different variations of lemon cake over that past few months but I finally think that I may have perfected it. This cake is made up of a moist lemon sponge, a gooey lemon curd centre, and is covered in tangy lemon butter cream. I've kept it simple and decorated it with fresh lemon and mint leaves dusted with icing sugar.  


Ingredients 
( Makes an 8 inch round cake)

FOR THE CAKE 

450g Caster Sugar
450g Butter (softened)
8 Eggs 
450g Self Raising Flour (sieved)
Rind of 2 lemons 


FOR THE BUTTERCREAM 

300g Butter (softened)
600g Icing Sugar 
2 tbsp fresh Lemon Juice 
3-4 tbsp Boiling Water 


FOR THE LEMON CURD

2 Eggs (lightly beaten) 
200g Caster Sugar 
3 Lemons (juice of all three, zest of one)
75g Butter 


Method

FOR THE CAKE 

1) Preheat your oven to 180C/ 350F / Gas Mark 5, grease your baking tin  with oil or melted butter and line it with grease proof paper
2) Cream the butter and sugar together using your electric mixer until fully combined. The secret for this cake is to be patient when mixing.
3) Add in the eggs one by one and continue to mix.
4) Once combined again, start to add in the sieved flour, one spoon at a time as you mix 
5) Once all the flour is in, add the lemon rind and continue to mix - be patient and allow the mixture to form a light fluffy texture 
6) Pour the mixture into your lined baking tin and bake for approximately 40-50 mins until golden brown and no longer gooey in the centre 
7) Once cooked, leave the cake to cool on a wore tray while you prepare the lemon curd and butter cream 


FOR THE LEMON CURD 

1) Whisk the eggs and sugar in a large heat proof bowl until combined
2) Add in the lemon juice and rind and continue to stir
3) Then add the butter and sit the bowl over a saucepan of simmering water, ensuring that the bowl does by actually touch the water 
4) Stir the mixture until the butter has melted and then leave for a further 10 minutes stirring from time to time - the mixture should have thickened but leave the bowl to sit to one side until you are ready to use it so it thickens further. You probably won't use all the curd in the cake so enjoy it on toast or digestive biscuits - yum! 


FOR THE BUTTER CREAM 

1) Mix the butter and sugar together in the electric mixer until creamy (be patient it might take a while) 
2) Then add in the lemon juice and continue to beat 
3) Finally add in the boiling water and beat at a high speed until light and fluffy 


To Assemble

1) Using a long bread knife, slice the cake in two 
2) Separate the layers and squeeze fresh lemon juice or a few tsp of lemon liquor into each
3) Then spread the lemon curd onto one half, topped by a layer of butter cream
4) Sit the plain layer on top of the other and completely cover the cake in the remaining butter cream 
5) Decorate as you wish and enjoy


You can also use the same recipe to create these cute lemon cupcakes. Simply half the ingredients, follow the same recipe, but, divide the mix into cupcake cases rather than one baking tin.

Friday, 14 February 2014

Spread the Love with a Red Velvet Cake

Why not spread the love this Valentine's Day by baking something sweet for that special someone? This Red Velvet Cake is the perfect for the occasion. I've been fascinated by Red Velvet and have been meaning to try a Red Velvet Cake for a while, so when I was considering recipes for Valentine's Day this cake really did seem like the perfect cake to bake. The deep brownish-red colour of the cake comes from the chemical reaction of the anthocyanins in the cocoa powder with an acid which in this case is the buttermilk and to add to the effect red food colouring is also used. 


Ingredients 
FOR THE CAKE 

225g Butter (softened) 
4 tbsp Water 
55g Cocoa Powder
3 Eggs (lightly beaten) 
250ml Buttermilk 
2 tsp Vanilla Extract 
2 tbsp Red Food Colouring
280g Plain Flour
55g Cornflour
1.5 tsp Baking Powder 
280g Caster Sugar 

FOR THE FROSTING 

90g Butter
20g Cream Cheese
200g Icing Sugar 
1 tsp Vanilla Extract


Method
FOR THE CAKE

1) Preheat the oven to 180C/ 350F/ Gas Mark 4 and grease your two 8inch round or your two heart shaped cake tins with oil and line with greaseproof paper
2) Melt the butter along with the water and cocoa powder in a saucepan until fully melted and smooth, then take off the heat
3) In your mixing bowl, whisk the eggs, buttermilk, vanilla extract and red colouring until frothy
4) Then quickly and evenly stir in the flour, cornflour and baking powder, followed by the caster sugar 
5) Divide the mixture evenly between the two tins and bake for approximately 25-30 mins, until the mixture has risen and is firm to te touch 


FOR THE FROSTING 

1) Cream the butter and cream cheese together, followed by it and the and icing sugar together in a bowl until light and fluffy
2) Add in the vanilla extract and beat again until smooth 
3) Using your pallet knife spread the frosting between the two layers and completely over the rest of the cake 
4) Decorate the cake however you wish - I used pink confetti hearts seens as it's Valentine's Day.


If you'd rather individual red velvet cupcakes instead of one large cake, simply half the mixture for 12 cupcakes, and, spoon 1-2 spoonfuls of the mixture into each bun case. Bake the cupcakes for approx 15 minutes until they are risen and from to the touch.


If you happen to have a heart shaped muffin mold, go ahead and use it, but if not, have no fear, there's a solution. Simply place a marble into each slot in your cake tin along with the bun case as demonstrated in the picture above. 


And again, decorate the cupcakes as you wish with the frosting and any other little hearts and bits n bobs to make them all the more special. 


Sunday, 29 December 2013

Chocolate Orange Triple Layer Cake

I baked this chocolate orange triple layer cake for a friend who loves chocolate but isn't a huge fan of traditional fruit cake this Christmas. The more I look at it though, I think that it would be a perfect celebration cake to serve at any party on New Years Eve. There are a couple of different elements involved in making this cake - the orange and chocolate marble sponge, the chocolate orange buttercream & the dark chocolate orange ganache - but, it's still not overly difficult to make and believe me it's well worth the effort.


Ingredients
FOR THE MARBLE SPONGE...
225g Butter
225g Plain Flour (sieved)
4 Eggs
2 tbsp Cocoa powder
Rind of 1 large Orange

Method 
FOR THE MARBLE SPONGE...
1) Preheat your oven to 180C/ 350F / Gas Mark 4, grease a 6" round baking tin with melted butter and line with greaseproof paper
2) Cream your butter and sugar together in your mixer
3) When the mixture is of a creamy consistency, add in the eggs, one by one as you continue to mix
4) Add the sieved flour to the mixing bowl, one spoonful at a time and mix until the mixture is light and fluffy 
5) Split the mixture in half and to one half add the orange rind and to the other add the cocoa powder 
6) Pour some of the dark mixture into your lined tin, then some of the white mixture and repeat until all batter is in the tin 
7) Using a metal spoon, draw "S" shapes into the batter to create a marble effect
8) Bake in the oven for approx 40 mins and when done leave to cool on a wire tray over night 

You can make your Ganache and Buttercream while the cake is cooling, but don't assemble until the cake is fully cool.

Ingredients
FOR THE CHOCOLATE BUTTERCREAM...
200g Icing Sugar
100g Butter (softened)
50g Dark Chocolate (melted)
1-2 tbsp Boiling Water

Method
FOR THE CHOCOLATE BUTTERCREAM...
1) Using your electric mixer, cream the butter and icing sugar until the mixture is really light and creamy
2) Add the melted chocolate to the mixture, one spoonful at a time and mix until all is combined
3) Then add one tbsp of boiling water and mix on a high speed to make the buttercream that little bit lighter and more fluffy.
4) Leave the buttercream to one side while you make the ganache


Ingredients 
FOR THE DARK CHOCOLATE & ORANGE GANACHE...
280g Dark chocolate
130g Whipping cream
2 tbsp Butter
2sp Cointreau

Method 
FOR THE DARK CHOCOLATE AND ORANGE GANACHE...
1) Break the chocolate into pieces and melt in a pot with the butter
2) When melted and combined, add in the cream and continue to stir
3) When combined again, add in the Cointreau and combine


To assemble (when the cake is fully cool)

1) Split the cake in three using a sharp bread knife
2)  Place the bottom layer on a cake board or plate and spread a layer of buttercream over it using a pallet knife
3) Place the next layer of sponge on top and spread a layer of ganache followed by a think layer of buttercream
4) Place the final sponge on top and cover the sides of the cake with the chocolate buttercream
5) Then spread the remaining ganache over the top of the cake in a thick layer and finally, using a piping bag, pipe the remaining buttercream around the bottom and top edges of the cake


I used Dr. Oetker chocolate stars and gold shimmer food spray which I won through an online competition this month to decorate the cake. I'm delighted I tried them as I really loved the effect and will definitely be using them in future! 

Saturday, 16 November 2013

Josh's Chocolate Honeycomb Digger Cake

So it's that time of year again - my godson Josh's Birthday! He's 3 this year and he insisted that I make him a "digger" cake to go with his "Bob the Builder" themed party. At first I panicked and wondered how on earth I was going to do something like that. I thought that I'd definitely have to resort to fondant icing which I HATE using. But, luckily I had a plan...


I went for a three layer chocolate sponge completely covered in chocolate buttercream. I decided to put more chocolate buttercream and crushed honeycomb between each layer and also to make mounds of rock and muck out of broken pieces of the honeycomb and Cadbury's Crunchie bar for the top. I positioned two toy diggers beside the mounds and sprinkled some cocoa powder nearby as dust. I had to be brave when it came to the text as it was my first EVER time trying to write on a cake with chocolate !!! Luckily it went pretty well but I think I might need a little more practice ! 


The Chocolate Sponge Recipe
Makes a 6" Round

YOU WILL NEED...

225g Butter
225g Caster Sugar
225g Self Raising Flour (sieved)
4 Eggs
2 tbsp Cocoa Powder
50g Chocolate (broken into tiny pieces)

METHOD

1) Preheat your oven to 180C / 350F/ Gas Mark 4, grease your tin with sunflower oil and line it with greaseproof paper.
2) Cream your butter and sugar to ther in a mixing bowl until really light and fluffy.
3) Add in the eggs, one at a time, and continue to beat. 
4) In a separate bowl combine the sieved flour, the cocoa and the chopped chocolate.
5) Then begin to add the flour mixture to the mixing bowl, one spoon at a time.


6) When fully mixed, pour into your lined baking tin and bake for approx. 40 mins until the sponge in springy to touch.


7) Leave the sponge to cool on a wire tray while you prepare your buttercream. 


To Make the Chocolate Buttercream... 

YOU WILL NEED

500g Icing Sugar
250g Butter (softened) 
2 tbsp Boiling Water 

METHOD
1) Beat the sugar and butter together in the mixing bowl until light and fluffy. 
2) Turn up the beater and add in the boiling water.
3) Keep beating until the cream in almost mousse like in texture, then set it to one side while you wait for your cake to be fully cool. 
4) Split the cake in 2/3 with a sharp bread knife and fill each layer with buttercream and honeycomb.
5) Spread the remaining buttercream over the entire cake using a pallet knife and decorate however you wish.